Choosing the right West Rim helicopter tour is less about price and more about understanding the crucial details that define a luxury experience.
- True value lies in knowing the operational difference between the exclusive West Rim and the National Park’s South Rim, which dictates landing possibilities.
- Aircraft selection is paramount; the superior visibility and comfort of an Eco-Star helicopter significantly enhance the flight.
Recommendation: Prioritize a champagne landing tour in an Eco-Star helicopter, but first, verify the on-ground duration and be aware of potential weight-related surcharges to budget accurately.
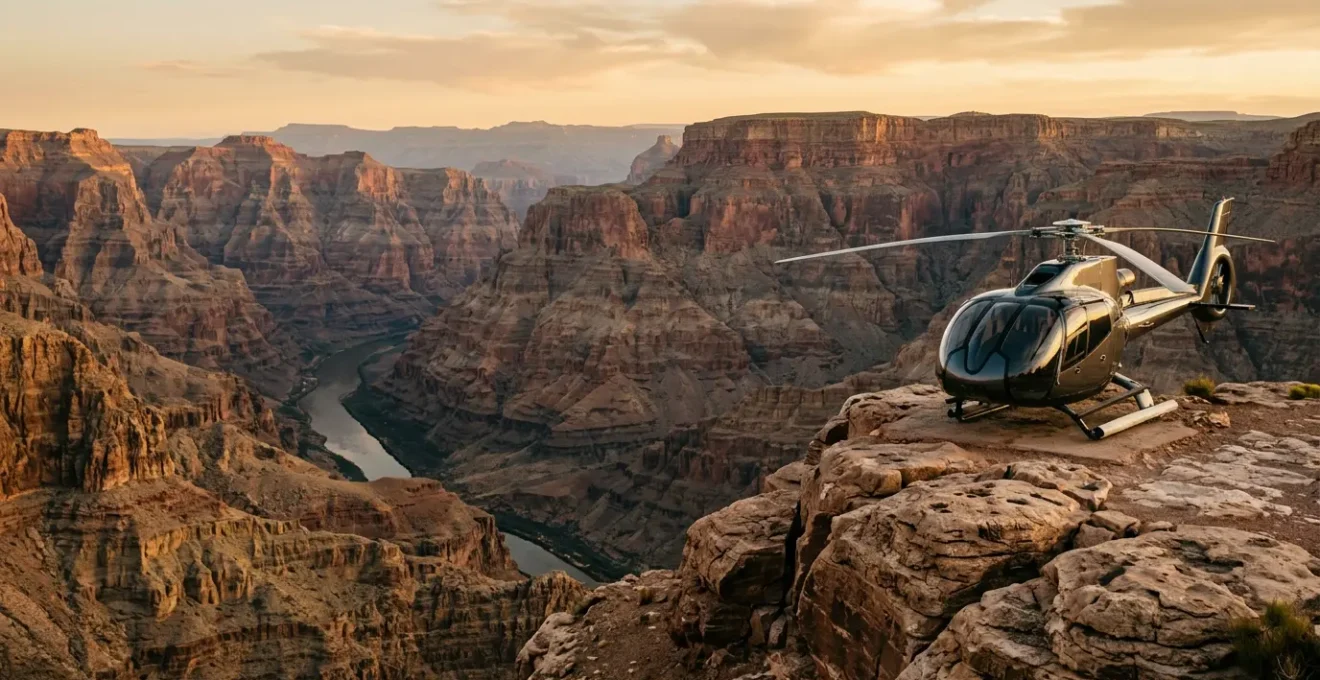
The vision of soaring over the Grand Canyon in a helicopter, a glass of champagne in hand as you touch down on a private bluff, is a quintessential bucket-list item. Yet, for the discerning traveler, the path from dream to reality is cluttered with a dizzying array of tour options, price points, and vague promises of « breathtaking views. » Many simply default to the most visible online package or the seemingly cheapest option, only to be met with unforeseen compromises.
As an aviation tour broker, I advise my clients that a truly memorable flight is not found by sorting by price. It is curated. The difference between a standard tourist flight and an exceptional, once-in-a-lifetime experience lies in understanding the subtle but critical details: the specific landing rights of your destination, the model of the helicopter you’ll be flying in, and even the time of day you depart. These are the elements that separate a fleeting photo op from a profound memory.
This guide moves beyond the glossy brochures to give you the insider knowledge required to make an informed choice. We will deconstruct the key decisions you must make, transforming you from a passive tourist into the architect of your own perfect Grand Canyon adventure. From the fundamental choice of rim to the nuances of aircraft design and the fine print that can impact your final cost, you will learn how to invest not just in a flight, but in an impeccably tailored experience.
To navigate these critical decisions, this article breaks down everything you need to know. Below is a summary of the key points we will cover to ensure you book with confidence and clarity.
Summary: Your Guide to the Perfect West Rim Helicopter Experience
- Why the West Rim is Not the National Park South Rim?
- How to Book a Champagne Picnic Landing Inside the Canyon?
- Eco-Star vs. Bell Ranger: Which Helicopter Has Better Visibility?
- The Surprise « Weight Restriction » Fee That Increases Your Ticket Cost
- When to Fly: Morning Smoothness vs. Sunset Colors?
- Strip View vs. Mountain Sunset: Which Rooftop Offers the Better Photo Op?
- How to Walk the Mike O’Callaghan–Pat Tillman Memorial Bridge for the Best View?
- Colorado River: How to Kayak the Black Canyon from Vegas?
Why the West Rim is Not the National Park South Rim?
The first and most crucial decision is understanding *where* you are flying. While both are part of the same immense geological wonder, the West Rim and the South Rim are entirely different destinations, governed by different rules. The South Rim is part of the U.S. National Park System, which strictly prohibits helicopters from landing below the rim. It is a destination for ground-based sightseeing and vast, panoramic overlooks. The West Rim, however, is sovereign Hualapai Tribal land. As Grand Canyon West’s officials state, « The West Rim is not only a wonder of the world, but it’s also a tourist destination owned and operated by the Hualapai Tribe. »
This sovereignty is the key. Because it operates outside of National Park regulations, the Hualapai Nation grants specific aviation partners the exclusive and coveted rights to land deep within the canyon. This distinction is everything for the luxury traveler. A West Rim tour offers the unparalleled experience of descending 3,500 feet to a private bluff near the Colorado River—an intimate encounter with the canyon’s scale that is physically impossible at the South Rim. Furthermore, the West Rim is significantly more exclusive; official data shows about 1 million annual visitors compared to the South Rim’s nearly 6 million. For those seeking the « land in the canyon » experience, the choice is clear: it must be the West Rim.
How to Book a Champagne Picnic Landing Inside the Canyon?
Once you’ve set your sights on the West Rim, the marquee experience is the champagne picnic landing. This is the tour that elevates a scenic flight into a core memory. Operators market this heavily, and the price reflects its premium nature, with 2024 pricing data showing landing tours ranging from $539 to $739, compared to basic aerial tours that start around $269. However, not all « champagne landings » are created equal. To ensure you’re getting the luxury experience you’re paying for, you must ask the right questions before you book.
The term « private picnic » can be misleading. Landing sites are designated zones shared among several operators, meaning other helicopters and groups will likely be present. The key is to clarify the details that define the quality of your time on the ground. This includes the exact landing depth, the duration of your stop (which directly impacts photo opportunities), and the specifics of the catering provided. A truly premium operator will be transparent about these details. Before committing, an informed traveler must perform due diligence to see past the marketing headlines.
Your Pre-Booking Audit: 5 Questions for Your Champagne Tour
- Verify Landing Location: Confirm the exact landing depth (e.g., 3,200 vs. 3,500 feet below the rim) and its proximity to the Colorado River.
- Inquire About Catering: Ask about the specific brand of champagne and if dietary accommodations (vegetarian, vegan, allergies) can be met for the picnic meal.
- Confirm Ground Time: Clarify the exact duration of the landing, which typically ranges from 20 to 30 minutes, to set expectations for your time on the canyon floor.
- Clarify « Private » Claims: Understand that landing sites are shared. Ask how the operator manages spacing and timing with other concurrent tours to ensure a quality experience.
- Check Aircraft & Seating: Confirm the helicopter model (ideally an Eco-Star) and ask about the seating arrangement to ensure optimal views, which we’ll cover next.
Eco-Star vs. Bell Ranger: Which Helicopter Has Better Visibility?
A helicopter tour is a visual experience, and the aircraft you fly in is as important as the destination itself. The two most common helicopters used for Grand Canyon tours are the Bell Ranger and the Airbus Eco-Star EC130. For a standard, budget-focused aerial tour, the Bell Ranger is a functional workhorse. But for the premium, high-budget traveler, there is no substitute for the Eco-Star. The difference in the passenger experience is night and day, primarily due to visibility.
The Eco-Star was designed specifically for tourism. Its defining feature is a massive, one-piece wraparound windshield and oversized windows, providing genuine 180-degree panoramic views. Crucially, it features stadium-style seating, where the rear seats are slightly elevated over the front seats, ensuring that every passenger has an unobstructed forward view. This is a stark contrast to the Bell Ranger’s traditional flat seating and smaller windows, where a middle-seat passenger in the back may find their view compromised by the pilot and front passengers. The image below illustrates the open, spacious feel of a modern touring helicopter cabin designed for maximum visibility.
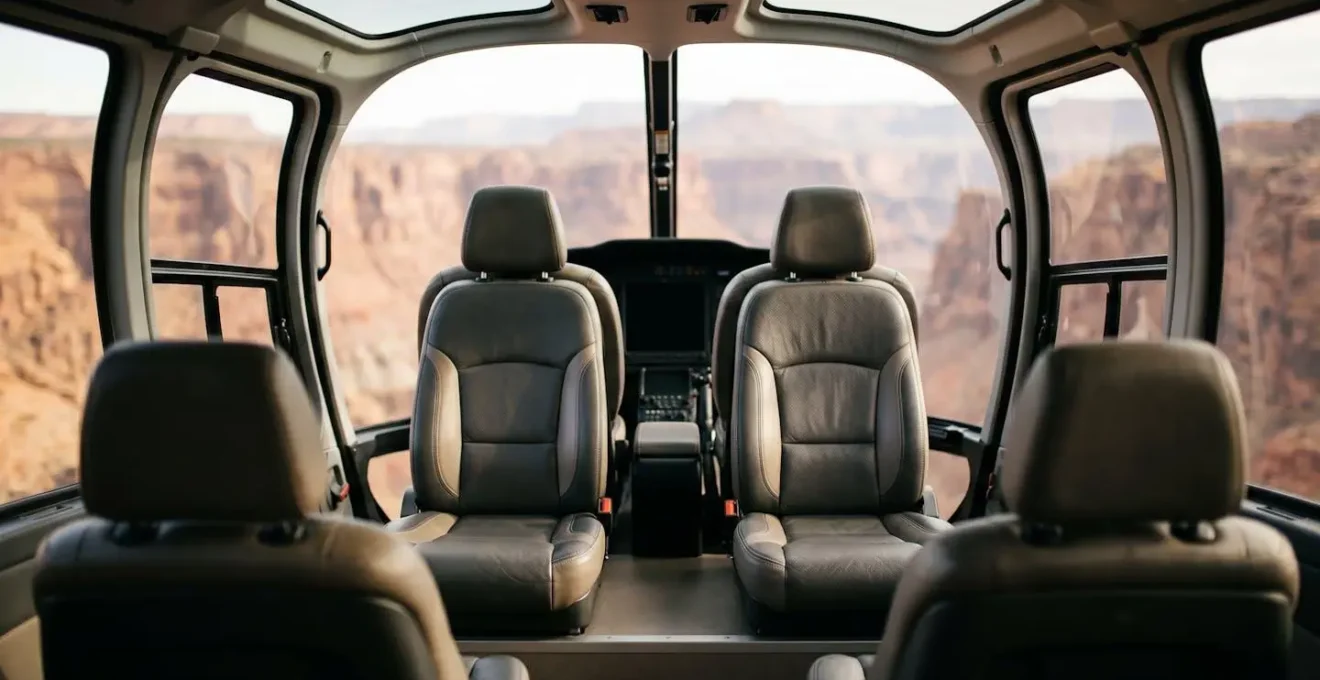
Beyond visuals, the Eco-Star is 25% larger inside and up to 50% quieter due to its enclosed Fenestron tail rotor, creating a more comfortable and less intimidating environment, especially for first-time or anxious flyers. When you are investing in a top-tier landing tour, ensuring you are booked on an Eco-Star is a non-negotiable part of securing your money’s worth.
This comparative table breaks down the key differences that directly impact the quality of your flight.
| Feature | Eco-Star EC130 | Bell Ranger |
|---|---|---|
| Window Design | Wraparound glass, 65+ sq ft, 180° unobstructed views | Smaller conventional windows, some frame obstruction |
| Seating Configuration | Stadium-style stepped seating — rear passengers elevated for clear views | Traditional flat seating — rear passengers may have limited forward views |
| Cabin Space | 25% more cabin space, 7 passengers + pilot | Smaller cabin, 6 passengers + pilot |
| Noise Level | 50% quieter due to Fenestron enclosed tail rotor | Conventional tail rotor, higher cabin noise |
| Vibration & Smoothness | Advanced rotor system, smoother ride, better for anixous flyers | More traditional feel, slightly more vibration |
| Photography | Pros: Minimal window frame intrusion | Cons: More glare from large glass | Pros: Less glare, some windows can open on specialty tours | Cons: Frame intrusion in shots |
| Typical Use | Premium landing tours, deluxe aerial tours | Budget aerial tours, some landing tours |
The Surprise « Weight Restriction » Fee That Increases Your Ticket Cost
In the world of aviation, weight and balance are paramount safety considerations. In the context of tourism, they are also a crucial, and often surprising, financial one. Every helicopter tour operator has a policy regarding passenger weight, and failing to account for it can significantly increase your final cost. Most operators require passengers who weigh over a certain threshold—typically 299 or 300 pounds—to purchase an additional « comfort seat. » This is not a penalty; it is an operational necessity to ensure the aircraft remains balanced and all passengers have adequate space.
The financial impact, however, can be substantial. According to 2024 helicopter tour operator policies, this « comfort seat » fee can range from a flat $50 surcharge to the full price of a second ticket, sometimes exceeding $300. This is determined at check-in, where all passengers are discreetly weighed. For couples or groups traveling together, understanding how different operators apply this policy is critical for accurate budgeting, as a simple choice of operator can result in hundreds of dollars of difference.
Case Study: How Weight Policies Affect a Couple’s Total Cost
A comparison of two major operators, Papillon and Maverick, highlights this variance. Papillon typically charges a flat surcharge (around $200) for passengers over 299 lbs. Maverick, however, often requires the purchase of an entire additional seat for passengers over 300 lbs. For a couple where one partner weighs 310 lbs, a tour with Papillon might cost their two base tickets plus a $200 fee. The same tour with Maverick could require them to purchase three full seats, potentially adding $300-$500 to the total cost. This case study underscores the importance of checking the specific weight policy of your chosen operator *before* booking, especially if any member of your party is near the threshold.
When to Fly: Morning Smoothness vs. Sunset Colors?
After selecting your rim, tour, and aircraft, the final major decision is timing. The two most popular departure windows are early morning (typically 7-10 AM) and late afternoon for a « sunset » tour. Each offers a distinct advantage and a corresponding trade-off. As a broker, my advice depends entirely on the client’s priority: guaranteed operational reliability or the pursuit of photographic perfection.
Morning flights are the pragmatic choice for smoothness and certainty. The desert air is typically cooler, calmer, and clearer in the morning, leading to a less turbulent flight. This is the ideal window for anxious flyers or anyone prioritizing comfort. Furthermore, helicopter tour operator safety data shows that afternoon flights have a statistically higher risk of weather-related cancellations or delays due to thermal turbulence and winds that build throughout the day. Booking a morning flight gives you the highest probability of flying as scheduled.
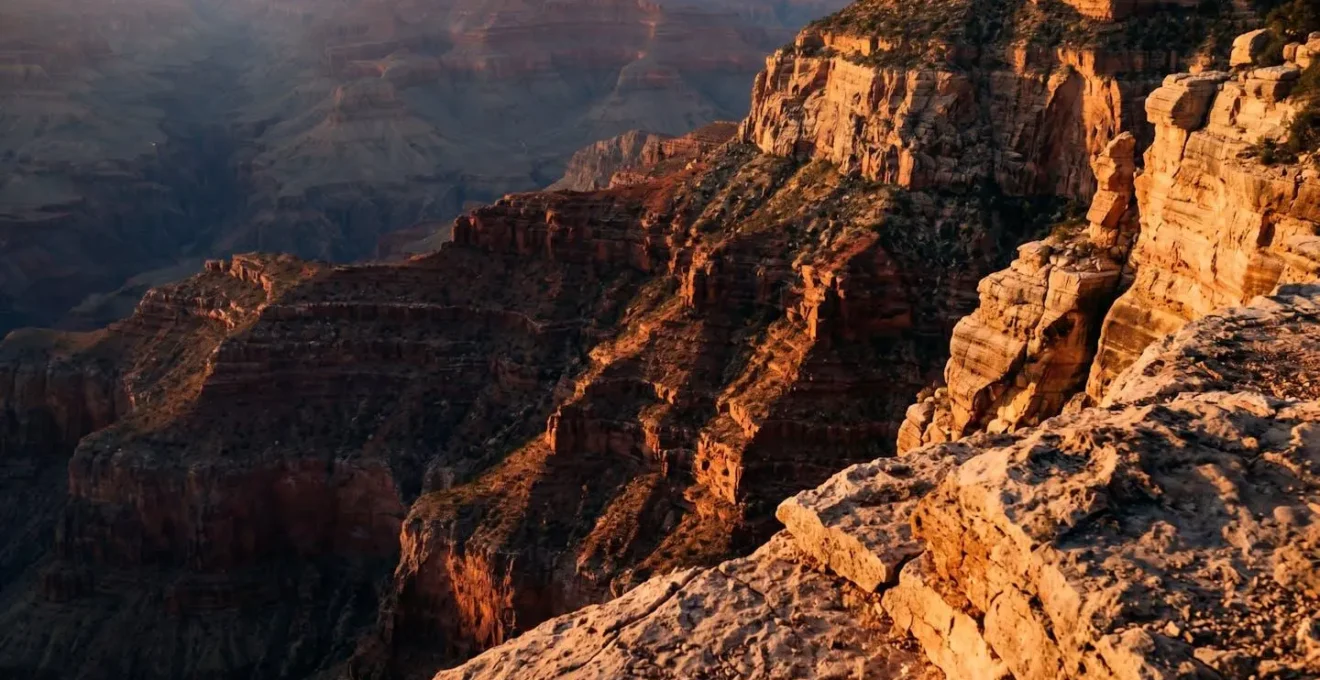
Sunset tours, conversely, are the choice for photographers and romantics. While the air can be bumpier, the reward is witnessing the canyon’s features transform under the « golden hour » light. The low-angle sun creates long, dramatic shadows that sculpt the rock formations, revealing textures and a depth of color that are simply not visible under the flat, high sun of midday. This interplay of warm light and deep shadow creates unparalleled photographic opportunities, turning the landscape into a dynamic canvas.
Strip View vs. Mountain Sunset: Which Rooftop Offers the Better Photo Op?
A helicopter tour over the Grand Canyon is an apex experience. The question then becomes: how do you frame this highlight within your larger Las Vegas itinerary? As a broker, I often advise clients to « pair » their tour with a carefully chosen rooftop bar experience, using it as either a celebratory finale or an anticipatory prelude. The choice of rooftop—one overlooking the glittering Strip or one facing the serene desert mountains—can create a powerful narrative for your day.
A post-flight celebration at a Strip-view rooftop like the Foundation Room offers a thrilling sense of arrival. As you toast your adventure, the neon city sprawls below, a glittering counterpoint to the raw, natural beauty you just witnessed. This is the high-energy, celebratory option, perfect for capturing dynamic photos with the iconic lights of Las Vegas as your backdrop. It’s the perfect way to transition from the quiet majesty of the canyon back to the vibrant pulse of the city.
Alternatively, visiting a mountain-facing rooftop, such as those at Red Rock Resort, the evening *before* your flight provides a completely different, more contemplative experience. Watching the sun set over the same desert expanse you will soon soar across builds a profound sense of anticipation. It allows you to appreciate the vast, quiet landscape in peace, creating a « calm before the thrill » moment. This option is ideal for landscape photography and setting a tone of reverence for the adventure ahead. The ultimate strategy involves both: a mountain sunset to begin the story, and a Strip view to celebrate its conclusion.
How to Walk the Mike O’Callaghan–Pat Tillman Memorial Bridge for the Best View?
For travelers looking to build a multi-day narrative around their Grand Canyon experience, the Mike O’Callaghan–Pat Tillman Memorial Bridge offers a spectacular and often overlooked opportunity. While some view it as a « budget alternative » to a helicopter tour, the savvy traveler understands it as a powerful complementary perspective. The bridge arches 900 feet above the Colorado River, offering a pedestrian walkway with a breathtaking, aerial-like view of the Hoover Dam—a marvel of engineering nestled within the canyon.
Walking this bridge provides a unique context that enriches the subsequent helicopter flight. From this vantage point, you can truly appreciate the colossal scale of the Dam’s construction and its relationship to the surrounding geology. It’s a grounded, human-scale perspective on the immense forces—both natural and man-made—at play in this landscape. This experience serves as the perfect « prologue » to your aerial adventure, giving you a deep appreciation for the details you will later see from above.
Case Study: The Bridge Walk as a Narrative Prologue
Travel blogger Sarah Martinez documented this exact strategy. She walked the Memorial Bridge the day before her helicopter tour. « The bridge provided an incredible aerial-like perspective of the Hoover Dam… completely free, » she wrote. Her photos captured the massive scale of the Dam’s engineering. The next day, from the helicopter, she saw the same structure from a different angle, this time set within the vastness of the entire canyon system. She concluded, « The bridge showed me the ‘how’—the incredible human engineering. The helicopter showed me the ‘what’—the natural wonder that necessitated it. Together, they told the full story. » This demonstrates how combining experiences creates a richer, more complete travel narrative than a single tour ever could.
Key Takeaways
- The ability to land within the Grand Canyon is exclusive to the West Rim, which is sovereign Hualapai Tribal land.
- For superior visibility and comfort, an Eco-Star (EC130) helicopter with its stadium seating is the non-negotiable premium choice.
- Always verify landing duration, catering details, and potential weight-based « comfort seat » fees before booking to avoid surprises.
Colorado River: How to Kayak the Black Canyon from Vegas?
To craft the ultimate luxury adventure, the final step is to pair the « macro » view of the helicopter with the « micro » experience of the water. While your flight provides a breathtaking, high-speed overview of the canyon’s immense scale and geography, a guided kayaking tour on the Colorado River offers the sensory counterpoint: a slow, intimate, and silent journey from within. A day trip to kayak the Black Canyon section below the Hoover Dam is the perfect way to complete your sensory immersion in the landscape.
Where the helicopter is about speed (cruising at 150 mph) and scale, the kayak is about silence and detail. Paddling the calm, emerald waters, you’ll hear nothing but the dip of your paddle and the call of an osprey. You can glide up to the canyon walls to study geological strata up close, feel the cool air in shaded grottos, and spot wildlife like bighorn sheep at the water’s edge. This meditative experience provides a deep, textural understanding that perfectly complements the grand, visual narrative of the helicopter flight. Together, they create a complete memory that engages both the thrill-seeker and the contemplative naturalist in every traveler.
For a truly unforgettable 2-day itinerary from Las Vegas, I recommend the following sequence:
- Day 1 Morning (Air): Depart on your West Rim helicopter tour. Experience the adrenaline and the immense scale from above.
- Day 1 Evening (Celebrate): Return to Las Vegas and celebrate at a Strip-view rooftop, contrasting the natural wonder with man-made spectacle.
- Day 2 Morning (Water): Embark on a guided Black Canyon kayaking tour. Experience the silence, the wildlife, and the intimate textures of the canyon from water level.
By understanding these key decisions, you move beyond being a simple passenger and become the curator of your own bucket-list adventure. The next step is to take this knowledge and begin planning your perfectly tailored journey.