Capturing authentic Vegas neon is less about location and more about understanding its unique « analog glow » and historical texture.
- Real neon offers a 360-degree softness that LED cannot replicate, which is crucial for creating atmospheric shots with depth.
- Mastering low shutter speeds and Pro Mode settings on any camera is key to avoiding light flicker and capturing sharp, vibrant details in low light.
Recommendation: Treat the Neon Boneyard not as a backdrop, but as a portrait studio for historical artifacts, focusing on capturing the story told by their light, rust, and texture.
The siren call of Las Vegas has always been its light. For decades, it wasn’t the glare of a million tiny LEDs, but the warm, electric hum of neon that painted the desert sky. For the modern photographer, whether an Instagrammer seeking a retro aesthetic or an art lover documenting history, capturing this fading magic is a compelling challenge. The city’s visual landscape is a tale of two glows: the crisp, perfect light of today and the rich, imperfect luminescence of yesterday. To truly photograph vintage Vegas is to become a historian with a camera, documenting artifacts made of glass, gas, and electricity.
Many guides will point you to the most obvious spots, offering simple advice like « go at night. » But they often miss the soul of the subject. They treat these luminous giants as simple backdrops for a selfie, rather than complex subjects with their own stories and personalities. The common approach overlooks the technical nuances and the artistic narrative embedded in each sign’s design and decay. This can lead to flat, uninspired photos that capture the location but miss the magic. The truth is, the tools and techniques needed to do justice to these signs are more accessible than ever, whether you’re using a professional camera or the phone in your pocket.
But what if the key wasn’t just finding the signs, but learning to see their light? This guide adopts a different perspective. We will explore the artistic heritage of Las Vegas signage by focusing on the light itself—its quality, its color, and its texture. We’ll move beyond simple composition to understand the difference between an « analog glow » and a digital glare. You will learn not just where to point your camera, but how to make it see the history, the artistry, and the nostalgic warmth that makes these neon relics so captivating.
This journey will take us from the hallowed grounds of the Neon Boneyard to the bustling canopy of Fremont Street. We’ll cover the technical skills needed to master low-light conditions, the creative techniques to compose stunning shots safely, and the practical logistics to make your photo tour efficient and memorable. Prepare to see the lights of Vegas in a whole new way.
To help you navigate this visual adventure, this article is structured to guide you from the historical context to the practical application. The following summary outlines the key areas we will explore on our photographic journey into Vegas’s luminous past.
Summary: A Photographer’s Journey Through Vegas’s Luminous Past
- Why the « Boneyard » is More Than Just Old Metal and Glass?
- How to Capture the Flicker of Neon Without Banding Lines?
- Real Neon vs. Modern LED: Which Creates the Authentic Vegas Glow?
- The Risk of Climbing Structures for that « Perfect » Neon Selfie
- In What Order Should You Visit the Iconic Signs to Save Uber Fares?
- How to Shoot Sharp Neon Photos with a Smartphone in Low Light?
- When to Visit the Neon Boneyard to See the Original Sands Sign?
- The Neon Museum: How to Visit the Boneyard Without Melting in the Sun?
Why the « Boneyard » is More Than Just Old Metal and Glass?
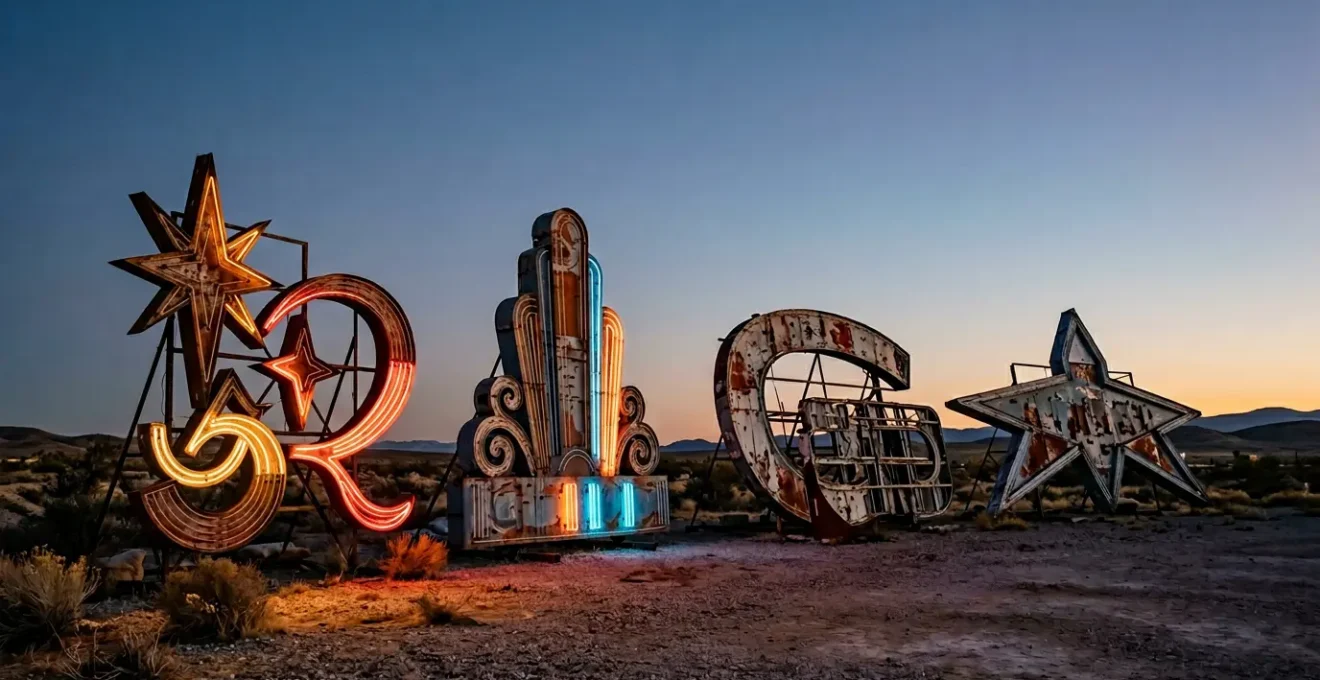
To understand the soul of vintage Vegas, one must first walk among its ghosts. The Neon Boneyard is not a junkyard; it’s a sanctuary, a final resting place where the city’s luminous history is preserved with reverence. The term « boneyard » traditionally refers to a storage area for discarded items, but here, the items are not trash. They are cultural artifacts, each with a story of ambition, entertainment, and eventual decay. The museum is home to a collection of more than 200 rescued neon sign pieces from over 200 Las Vegas properties, sprawling across its outdoor exhibition space.
Walking through the Boneyard is a powerful lesson in visual texture. In daylight, you are not just seeing signs; you are seeing history etched into their surfaces. The peeling paint, the intricate rust patterns, and the tangled skeletons of wiring tell a story that bright, functioning signs cannot. For a photographer, this is a goldmine. It’s an opportunity to capture the contrast between the bold, optimistic designs of the past and the inevitable entropy of time. The focus shifts from pure light to form, line, and decay—a much richer and more complex photographic subject.
Think of it as a portrait session with subjects that have lived a full life. You can focus your lens on the graceful curve of a letter from the Stardust, the faded glamour of a showgirl’s silhouette, or the bullet holes that scar a sign from an old casino. These details are the heart of the Boneyard’s appeal. It’s more than old metal and glass; it’s a tangible archive of dreams, a place where the city’s identity is laid bare for those willing to look closely.
How to Capture the Flicker of Neon Without Banding Lines?
One of the most common frustrations when photographing neon is « banding »—those ugly dark lines that appear across the image or video. This isn’t a flaw in your camera; it’s a conflict between your camera’s shutter speed and the alternating current (AC) that powers the neon tubes, causing them to flicker imperceptibly to the eye but very visibly to a sensor. Capturing a clean, smooth glow requires synchronizing your camera with this electrical pulse. It’s a technical challenge, but overcoming it is key to professional-looking neon photography.
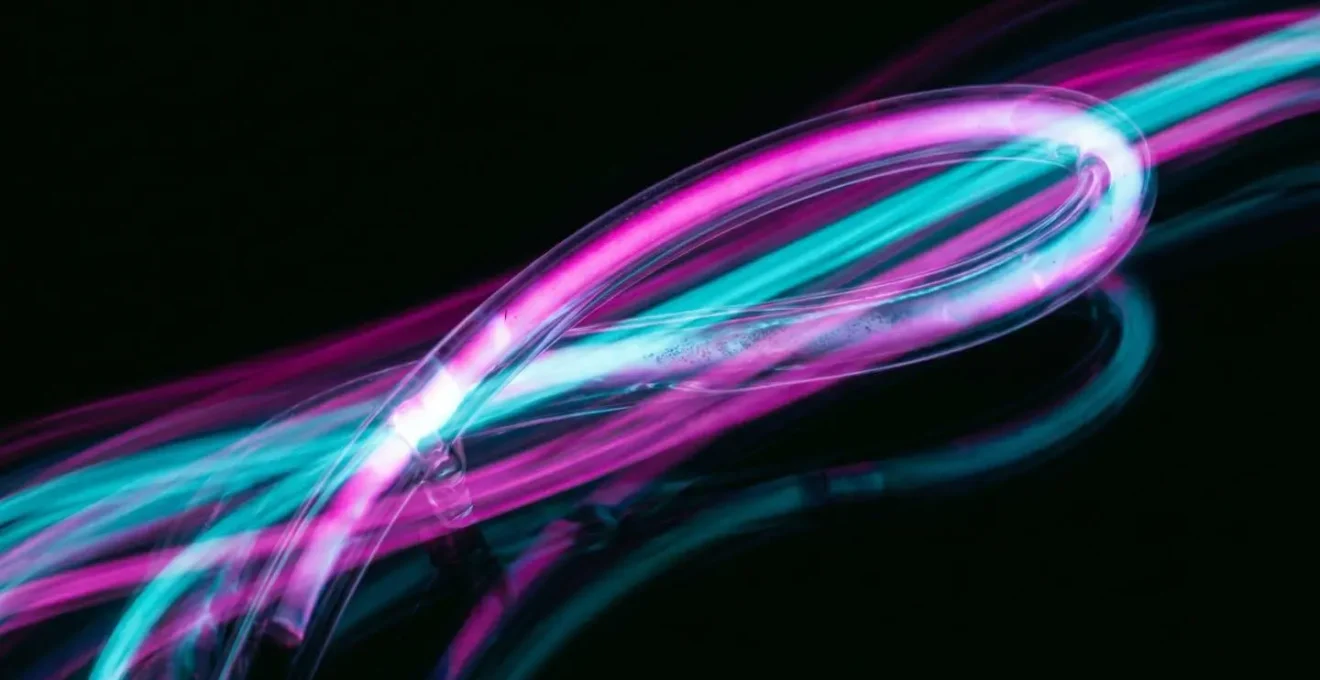
Instead of seeing this flicker as a problem, a visual artist can also embrace it. With a slow shutter speed and intentional camera movement, you can transform the flicker into beautiful, abstract light trails, turning a technical issue into an artistic effect. This technique allows you to paint with light, capturing the energy and movement inherent in the neon glow.
However, for a sharp, clean shot, you must tame the flicker. The primary tool for this is your shutter speed. Since North American electricity operates at 60Hz, using shutter speeds that are multiples of this frequency (like 1/60s or 1/120s) can often eliminate the banding. Many modern cameras also have a built-in « anti-flicker » mode that automatically detects the light cycle and times the shutter release to capture the brightest moment, effectively erasing the bands from your photos.
Action Plan: Shutter Speed Sync Techniques to Eliminate Flicker
- Set your camera’s anti-banding mode to match your region’s electrical frequency (60Hz for North America).
- Use shutter speeds that are multiples of the AC frequency, such as 1/60s or 1/120s, as a starting point.
- Enable the anti-flicker shooting mode if your camera supports it to automatically sync the shutter release.
- For video, match your frame rate or a multiple of it to the local frequency (30fps or 60fps).
- If banding persists, use your camera’s variable or « fine » shutter feature to adjust the shutter speed in tiny increments until the banding disappears from your live view screen.
Real Neon vs. Modern LED: Which Creates the Authentic Vegas Glow?
Not all that glows is neon. As you wander through Las Vegas, you’ll encounter two distinct types of light: the classic, noble gas-filled glass tubes of real neon and the modern, flexible ropes of Light Emitting Diodes (LEDs). For a photographer seeking that nostalgic, cinematic quality, understanding the difference is critical. The « authentic Vegas glow » is unequivocally the product of real neon. This isn’t just nostalgia; it’s physics. A true neon sign creates light in 360 degrees, casting a soft, even, and deeply saturated color that wraps around the glass tube. This is the source of the much-celebrated analog glow.
LEDs, in contrast, are directional. They are composed of many small points of light that project forward, creating a harsher, more clinical illumination. While brighter and more energy-efficient, LED light can appear flat or overly sharp in photographs, lacking the atmospheric haze and visual depth of real neon. It’s the difference between a vinyl record’s warmth and a digital file’s precision. One breathes with imperfection; the other is perfect and cold. As a visual artist, your choice of subject—real neon or an LED imitation—will profoundly impact the mood and authenticity of your final image.
This following table, based on an analysis of sign technologies, breaks down the key visual differences that matter to a photographer.
| Characteristic | Real Glass Neon | LED Neon Flex |
|---|---|---|
| Light Quality | 360-degree soft glow, light created within glass tube | Directional sharp points, up to 180-degree illumination |
| Color Rendering | Warmer, richer color palette from noble gases | Cooler, more precise color with potential coldness |
| Visual Texture | Analog imperfection, subtle brightness variations | Perfect uniformity, clinical precision |
| Photographic Effect | Natural depth, atmospheric glow, nostalgia | Brighter in photos, can appear harsh or flat |
| Heat Signature | Gets very hot, creates atmospheric haze | Cool to touch, no thermal distortion |
Case Study: Fremont Street’s Coexistence of Neon and LED
Fremont Street in downtown Las Vegas is a living laboratory where photographers can capture both technologies side-by-side. The area features restored vintage neon signs installed as public art, juxtaposed with the massive LED canopy of the Fremont Street Experience. To successfully photograph this mixed-lighting environment, shoot during the « blue hour » just after sunset, when the ambient light helps balance the two sources. Use a manual white balance (around 4500K) to preserve neon’s warmth without making LEDs appear too blue, and employ exposure bracketing to manage the high dynamic range between neon’s soft glow and LED’s intense brightness.
The Risk of Climbing Structures for that « Perfect » Neon Selfie
The pursuit of a unique angle can be tempting, especially when you see a stunning sign just out of reach. However, climbing structures, walls, or even the signs themselves is not only incredibly dangerous but also disrespectful to these historical artifacts. These are not playground equipment; they are often fragile, high-voltage pieces of art. The Neon Museum and other property owners have strict rules for a reason: to protect both the visitors and the priceless collection. Attempting to climb can result in serious injury, permanent damage to the sign, and immediate ejection from the property.
The « perfect » selfie is never worth the risk. A true artist knows that creativity thrives within constraints. The challenge isn’t to get higher, but to see differently from where you are. The most compelling photographs often come from clever composition and perspective, not from a perilous vantage point. Instead of climbing, think about how you can use the environment at ground level to create a dynamic and original shot. The most powerful tool you have is your creative eye, not your ability to scale a fence.
Furthermore, gaining unauthorized access or ignoring posted rules can jeopardize photo opportunities for everyone. Preserving these signs means respecting the guidelines in place to protect them. According to the Neon Museum’s official photo shoot policy, all members of a party must have a ticket to enter, reinforcing that these are protected exhibition spaces, not public parks. True appreciation is shown through responsible interaction.
Checklist: Safe and Creative Composition Techniques from Ground Level
- Use Reflections: After a rare desert rain, use reflections in puddles or even the glossy surface of a car to capture signs from a low angle without climbing.
- Frame Your Shot: Frame neon signs through architectural elements like doorways, arches, or metal frameworks to add layers and depth to your composition.
- Focus on Abstract Details: Zoom in on the beautiful curves of glass tubes, the texture of weathered paint, or the glowing connector points. An abstract shot can be more powerful than a full view.
- Create Depth with Aperture: Use a wide aperture (like f/1.8) to isolate a specific part of a sign. This selective focus creates a beautifully artistic and three-dimensional effect from a safe distance.
- Experiment with Low Angles: Place your camera on the ground (or a mini-tripod) and shoot upwards. This perspective can make signs feel monumental and heroic.
In What Order Should You Visit the Iconic Signs to Save Uber Fares?
A successful neon photo tour is as much about logistics as it is about light. Crisscrossing Las Vegas in Ubers can quickly drain your time and budget. A geographically logical itinerary allows you to spend more time shooting and less time in traffic. The most efficient route clusters the key neon destinations: the Neon Museum and the Fremont Street area. These two locations are the epicenter of vintage signage and are conveniently located within walking distance of each other in Downtown Las Vegas, far from the modern bustle of the Strip.
An itinerary optimized for a photographer should be dictated by the changing quality of light. Start your journey in the late afternoon. According to an itinerary suggested by the Neon Museum itself, this plan maximizes your photographic opportunities. Here is a battle-tested route:
- Late Afternoon (Golden Hour): Begin with a daytime tour of the Neon Boneyard. The low, warm angle of the sun during golden hour is perfect for capturing the texture, rust, and peeling paint on the unlit signs. This is when the signs’ physical history is most visible.
- Dusk (Blue Hour): As the sun sets and the sky turns a deep blue, walk south to the Fremont Street Experience. This is the magical moment when the restored vintage signs flicker to life, their colors popping against the twilight sky. It’s the ideal time to photograph lit signs without the sky being a pitch-black void.
- Night: After dark, explore the surrounding downtown area. You can revisit the Neon Museum for a Guided Night Tour to see their main collection brilliantly re-illuminated. Then, explore nearby locations like Atomic Liquors, which boasts one of the city’s oldest neon signs, and the Downtown Container Park. These are all clustered together, making for an easy, walkable night of shooting.
This strategic order not only saves on transportation costs but also ensures you are at the right place at the right time to capture each sign in its best possible light. Remember to book museum tickets well in advance, as time slots, especially for night tours, fill up quickly.
How to Shoot Sharp Neon Photos with a Smartphone in Low Light?
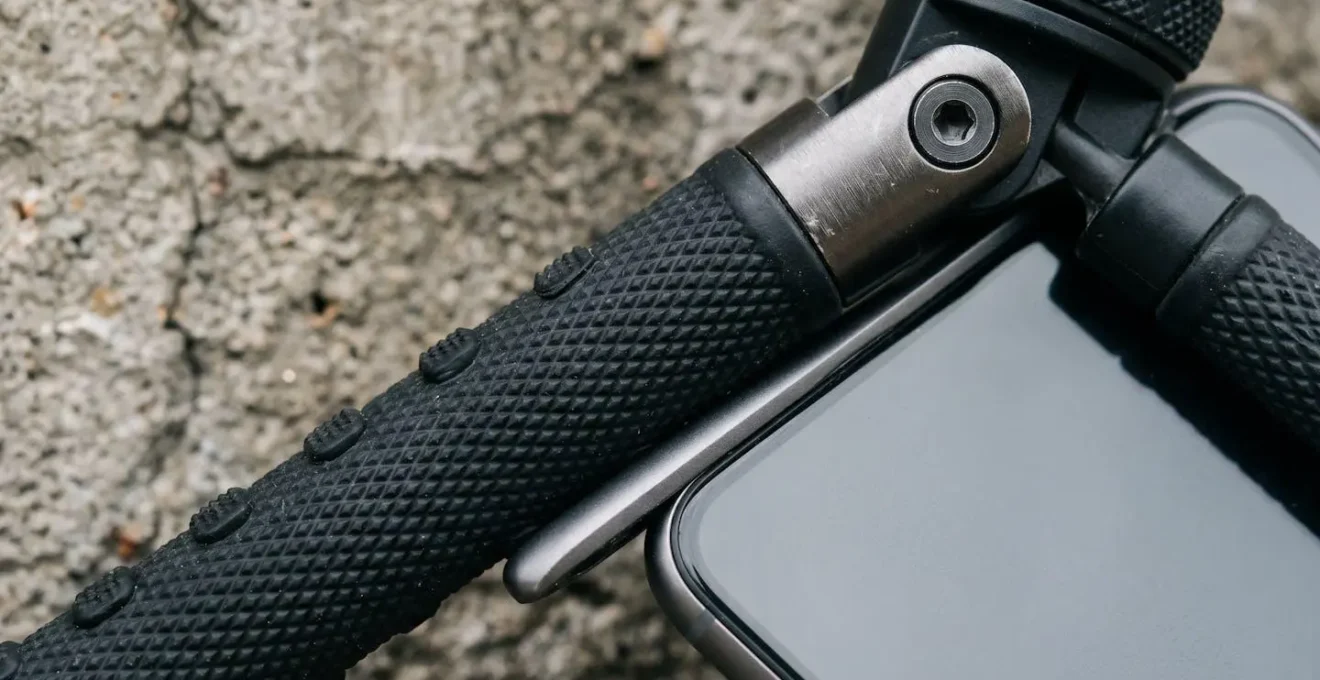
You don’t need a high-end DSLR to capture the magic of neon. Today’s smartphones are incredibly powerful photographic tools, especially when you take control away from the automatic settings. The key to sharp, vibrant neon photos with your phone is to use a « Pro » or « Manual » mode. If your native camera app doesn’t have one, third-party apps like Halide (iOS) or Manual Camera (Android) can unlock your phone’s full potential. Taking manual control allows you to prevent the two biggest problems in auto mode: blurry photos from a slow shutter and grainy images from a high ISO.
The most important principle is to keep your ISO as low as possible (ideally below 800) to minimize digital noise or « grain. » To compensate, you’ll need a steady hand or, even better, a small, pocket-sized tripod. This stability allows you to use a slightly slower shutter speed (like 1/60s) to gather enough light without introducing motion blur. Finally, lock your focus manually. In dark environments, autofocus systems tend to « hunt, » shifting focus and ruining the shot. Tap to focus on the sharpest detail of the neon sign and lock it in.
For achieving truly professional results, a little guidance can go a long way. As a guide on neon photography explains, the process doesn’t end when you press the shutter button.
Photographers using smartphones can achieve professional-grade results by combining manual controls with post-processing. The key is shooting in RAW format to capture the full color range when dealing with saturated neon tones, then using mobile apps like Snapseed or Lightroom Mobile to selectively reduce noise in shadow areas while enhancing neon colors without making them look artificial.
– Neon Signs Now, Guide to Neon Light Sign Portraits
By following these steps—stabilizing your phone, controlling your settings manually, and doing selective edits—you can create images that rival those from much more expensive equipment. Let the neon itself be your main light source, and turn off your phone’s flash, which would only wash out the beautiful analog glow.
When to Visit the Neon Boneyard to See the Original Sands Sign?
The original Sands hotel sign is one of the crown jewels of the Neon Museum’s collection. Its towering, elegant script is a direct link to the Rat Pack era, a piece of design history that defined an age of cool. To photograph it effectively, timing is everything. The sign, like many in the main Boneyard, is not fully restored to function continuously, so seeing it illuminated depends entirely on which tour you choose. The question isn’t just when to visit the Boneyard, but how you want to see this specific icon: as a sun-bleached relic or a reawakened beacon.
For the history-focused photographer, a daytime visit is essential. The low-angle sun of a late afternoon tour reveals the sign’s physical character: the texture of its weathered metal, the faded paint, and its sheer scale against the desert sky. This is your chance to capture its form and the story of its survival. You can get up close and document the details that are lost in the glare of night. The museum offers 45-minute guided tours during both daytime and evening, providing context on why each sign matters.
However, to see the Sands sign in its full, luminous glory, you must book a night tour. The museum’s brilliant guides use strategically placed lighting to illuminate many of the signs, including the Sands, bringing them back to life for brief, magical moments. This is when you can capture the iconic glow that once welcomed high-rollers and movie stars. As the travel experts at Lonely Planet note, the experience is transformative after dark.
Tours are usually given throughout the day, but are most spectacular at night.
– Lonely Planet, Neon Museum – Neon Boneyard attraction guide
The ideal answer, for the dedicated photographer, is to do both. Visit during the day to capture its texture and history, and return at night to capture its soul. This dual approach allows you to tell the complete story of this legendary piece of Las Vegas history.
Key Takeaways
- The artistic value of vintage neon lies in its « analog glow » and physical texture, which modern LEDs cannot replicate.
- Mastering camera settings (shutter speed, ISO, anti-flicker) is essential for capturing sharp, band-free images of neon light.
- A safe, ground-level creative approach using reflections, framing, and low angles yields better and more original photos than risky climbing.
The Neon Museum: How to Visit the Boneyard Without Melting in the Sun?
Photographing the outdoor collection at the Neon Boneyard is an unforgettable experience, but it comes with a significant environmental challenge: the relentless Mojave Desert sun. Las Vegas summer temperatures can be extreme and even dangerous. Planning your visit with the heat in mind is not just a matter of comfort; it’s a matter of safety and ensuring you have the energy to be creative. The museum itself takes this seriously, as its policy states that guided tours will not go out if the temperature is above 100 degrees. A melting photographer is not an effective photographer.
The most crucial strategy is timing. During the hot summer months, avoid midday at all costs. The best times to visit are either right when the museum opens in the morning or for one of the last afternoon tours leading into sunset. An evening or night tour is even better, as it allows you to bypass the heat entirely while seeing the signs illuminated. Your choice of clothing is also paramount. Light-colored, loose-fitting fabrics are a must. Technical moisture-wicking fabrics or linen are far superior to cotton, as they allow for better air circulation and dry faster, keeping you cooler.
Beyond timing and attire, you can use the museum’s layout to your advantage. The Boneyard experience includes access to the indoor, air-conditioned North Gallery. This space houses additional signs and offers a welcome refuge from the heat. Plan to spend time in this gallery during the hottest part of your visit to cool down and recharge before heading back out. A wide-brimmed hat, sunglasses, and high-SPF sunscreen are non-negotiable accessories for any daytime visit. By preparing for the environment, you can focus on your art instead of your discomfort.
- Visit right when the museum opens in the morning or book a tour closer to sunset.
- Wear light-colored, loose-fitting linen or moisture-wicking fabrics.
- Use the indoor, air-conditioned North Gallery as a cooling-off point.
- For the ultimate heat-avoidance, book an evening admission to see the signs fully illuminated.
- Always bring a wide-brimmed hat, sunscreen, and plenty of water.
Your journey into the world of neon photography begins now. Take these techniques, find your light, and start capturing the luminous history that still flickers in the heart of Las Vegas.